Gathering Information from cPanel
To set-up a standard email account provided with your hosting account is simple if you follow the following steps.
Before we start we need to get some information about your email account first.
This information is available in your cPanel control panel.
To login to your cPanel use the url http://{{your website}}/cpanel. Entering this into the address bar of your web browser will
redirect you to your cPanel login page.
To login, use the details we have provided when you first signed up for your hosting account.
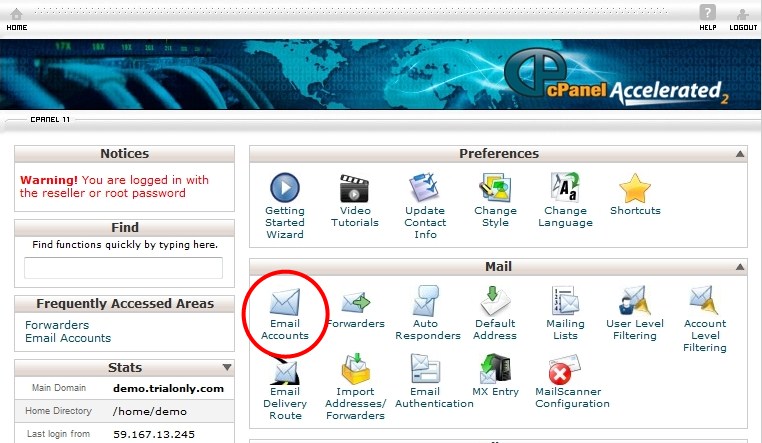
Once you've logged in, you'll see a page similar to the one below. Find the Mail section and
look for the Email Accounts icon and click on that.
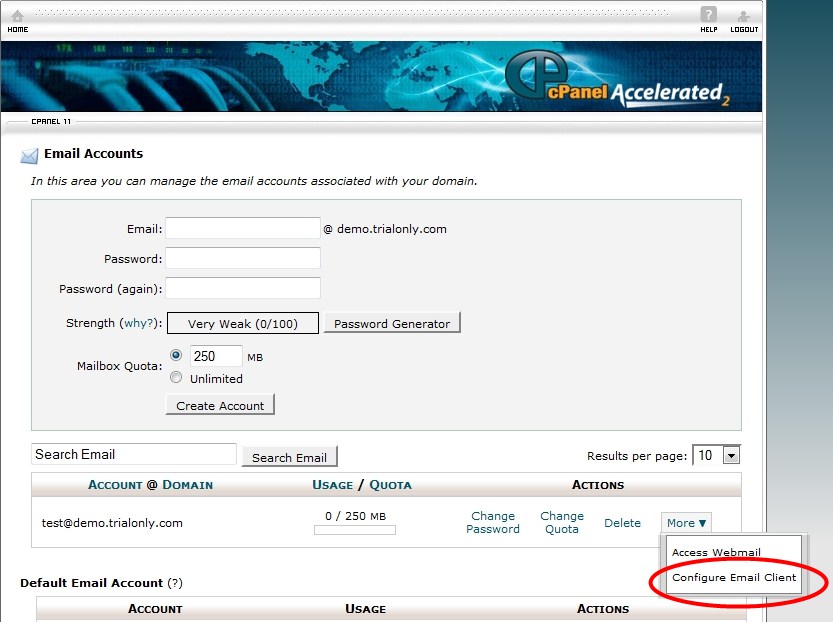
A new page will now displayed, similar to the one below. On this page look for the email account that you would like to
set-up on your iPhone in the list of email accounts and click on the More button on the right hand side of that email account.
This will display a short pop-up menu as per below. On this menu, please click on Configure Email Client.
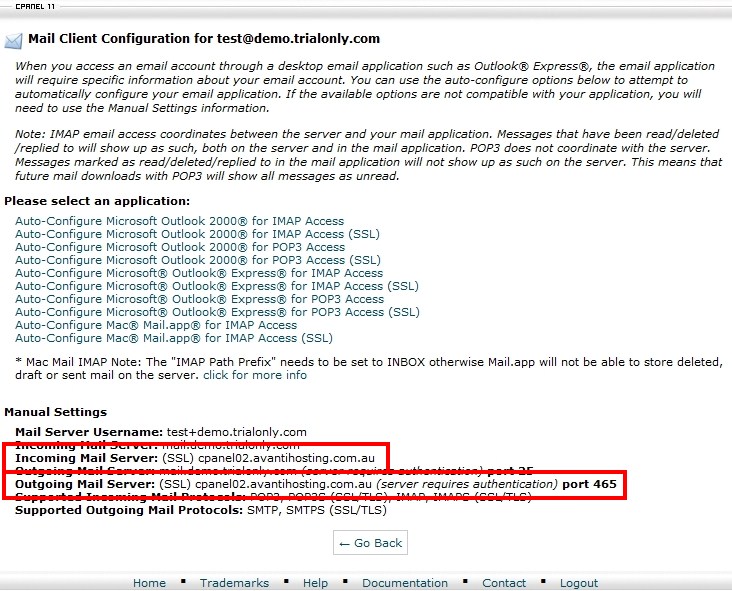
The next page will look similar as the one below, which contains the information we need to be able to set-up the email account on an iPhone.
On this page look for the two lines Incoming Mail Server (SSL) and Outgoing Mail Server (SSL) and note the name of the server displayed. In this example it would be cpanel02.avantihosting.com.au
Setting up the Account on an iPhone
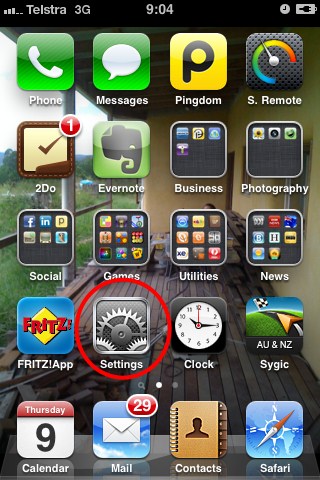
On the iPhone find the icon to change your Settings. It should look like the circled icon on the screen below. Once you have found it, please tap it, to bring up the settings screen.
On the settings screen scroll down until you can see Mail, Contacts, Calendars and tap on it as well to bring up the mail settings.
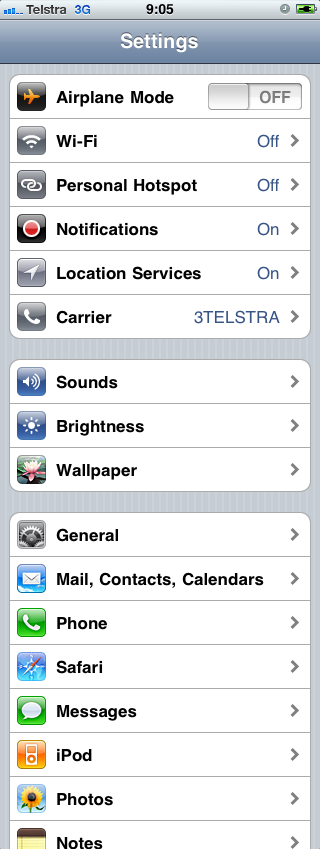
On the next screens, as shown below, tap on Add Account... to start setting up the email account.
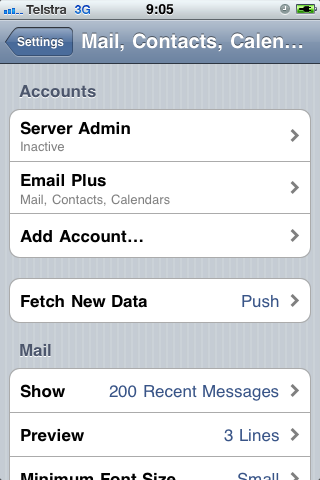
On this screen tap on Other
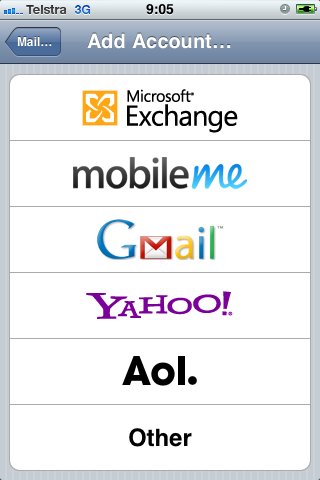
And then tap on Add Mail Account
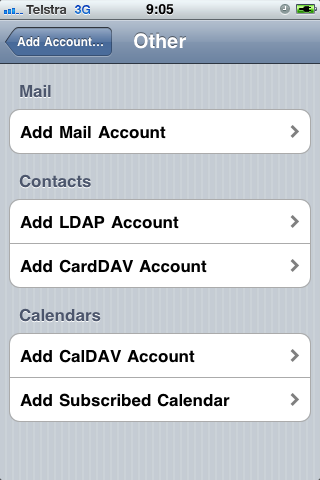
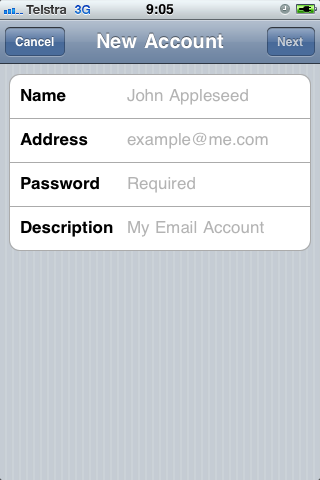
Here you start to fill in some details:
In the Name field, enter the name that you would like shown to people that receive emails from you.
In the Address field, you need to enter your full email address
In the Password field, enter the password to access your email account. If you can't remember you password, you can change that in cPanel.
In the Description field enter anything that will help you identify this email account on your iPhone. This is really only necessary if you set-up multiple email accounts on the iPhone.
Once you have filled in all the fields, click on the Next button on the top right of the screen.
On the next screen as per below, tap on POP at the top to highlight it
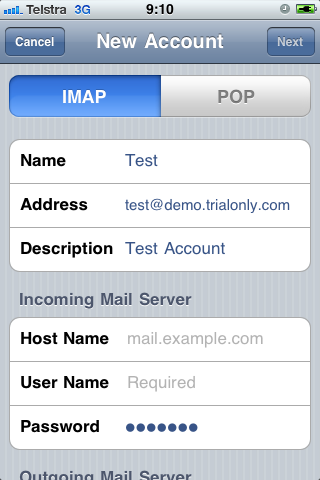
The screen will change to look as follows and the on-screen keyboard will be displayed as well.
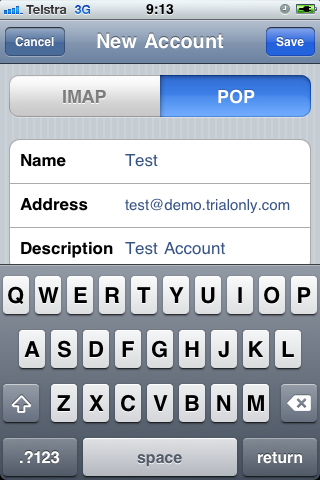
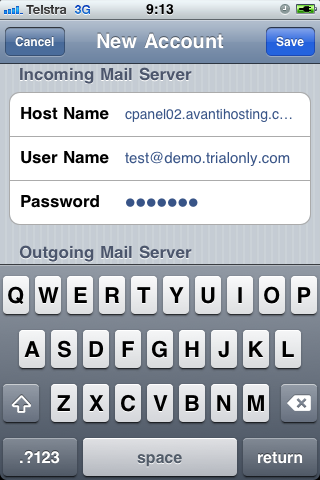
Scroll down until you see the group of settings under Incoming Mail Server
In the Host Name field enter the value that you copied for the incoming mail server from cPanel (without the leading (SSL))
In the User Name field enter the full email address of the account you are adding to your iPhone.
In the Password field enter the password for the email account.
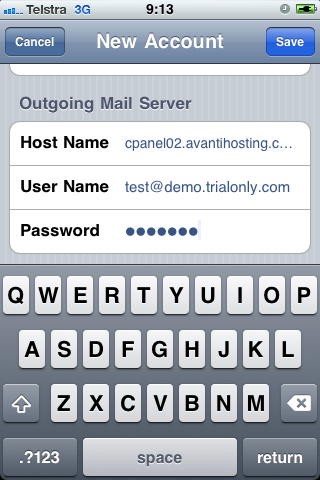
Next scroll down until you see the group of settings under Outgoing Mail Server
In the Host Name field enter the value that you copied for the outgoing mail server from cPanel (without the leading (SSL))
In the User Name field again enter the full email address of the account you are adding to your iPhone.
In the Password field again enter the password for the email account.
Last click on Save in the top right hand corner to save the settings.
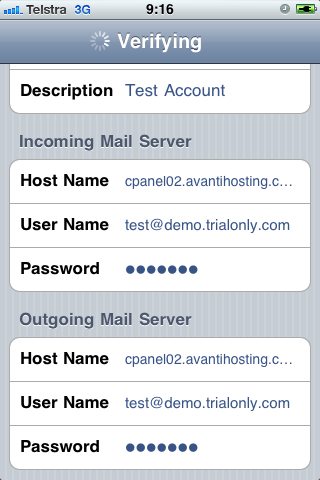
Your iPhone is now verifying the settings to ensure they work.
If you get an error verifying, please double check all settings for the incoming and outgoing mail server as well as the email address at the top of this page.
After the verification was successful, your email account is set up and your iPhone will display the Mail, Contacts, and Calendars settings page again.
Please tap on the account that you have just set-up to bring up the settings for that account again.
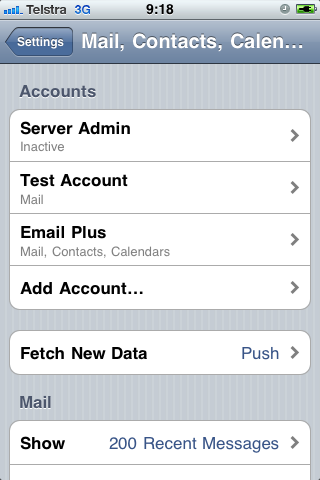
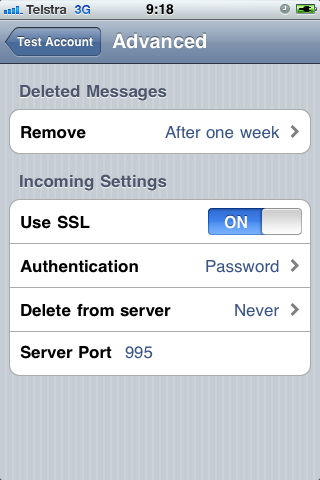
On this page scroll all the way down, and tap on Advanced to check the advanced settings.
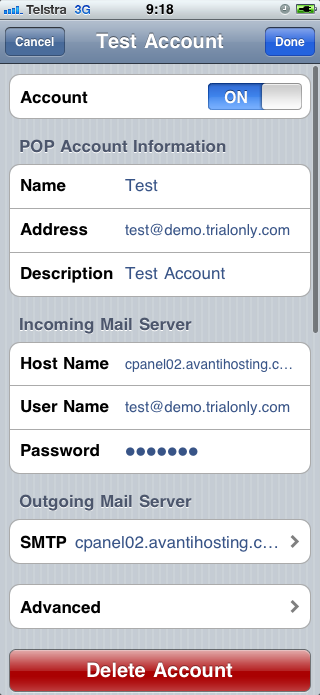
One important setting on this Advanced page is the setting Delete from server.
If you have this account set-up on a computer as well, that you will want to make sure that this setting is set to Never (which is the default).
If you this email account is only set-up on the iPhone and no other devices, you will want to change this setting to Seven days to ensure that your email inbox is not running out of space.
Your account is now set-up and you can close the settings pages and check your email in your email application.
If you have a large number of emails waiting to be read, it might take a little while for your email to be available on your iPhone while it is being downloaded.

